Cloud9 on your Pi
Apr 1, 2017 00:56 · 941 words · 5 minutes read
Introduction
A Raspberry Pi (in any of its variants) can be a useful linux server to have around the house or workplace. Adding a locally hosted Cloud9-IDE to your pi can help transform it into nice little development server. In this post we’ll go through the basics of getting a Cloud9-IDE up and running (we’ll assume you already have a Raspberry Pi with Raspbian installed, though you can certainly install Cloud9 on other boards/distros).
Installing and Running Cloud9-sdk
Installing cloud9sdk is simple, but can take a while (especially on a pi zero). Log in to your pi and install git and nodejs if you don’t already have them installed:
$ sudo apt-get update
$ sudo apt-get install git nodejs
Next, use git to fetch cloud9sdk, move into the installed directory and run the install script:
$ git clone https://github.com/c9/core.git c9sdk
$ cd c9sdk
$ ./scripts/install-sdk.sh
Now create a workspace directory — this will be your root working directory (but don’t worry, you can link other directories into this one, or even add your /home directory to the file tree). I’m calling it workspace in this tutorial:
$ mkdir workspace
Finally, start up the cloud9 server:
$ nodejs ./server.js -p 8181 -l 0.0.0.0 -a name:passwd -w workspace
This starts the server on port 8181, allows it to listen on all interfaces (not just localhost), sets a name:password for access (choose whatever you want here), and points the server to your workspace directory.
Using Cloud9
Now, from your desktop or laptop, point your browser to port 8181 of your raspberry pi: http://raspberrypi:8181/, (or use the IP address of your Pi) and you can log in with the name and passwd you supplied when starting the server. You should see something like:
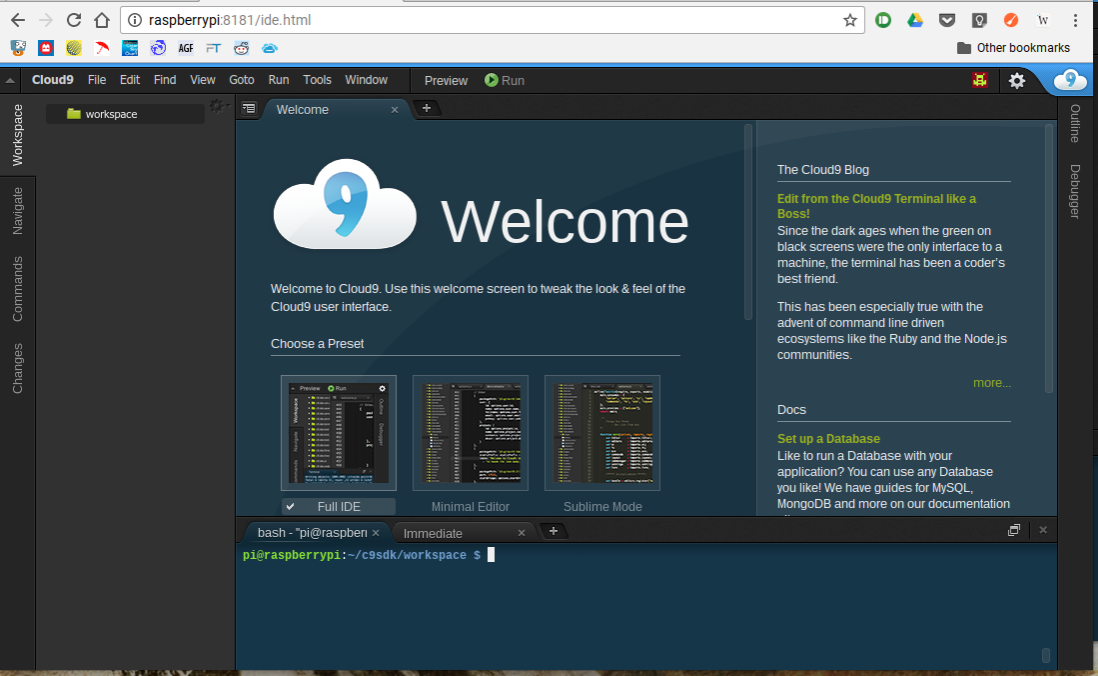
Basic Cloud9 IDE
This is the default full-ide layout (if your initial view doesn’t show the “Welcome” page in the editor pane, you can open it from the “Cloud9” menu at the top left). The left pane contains the filesytem (which is just the empty workspace directory at the moment), the top right pane is the typical editor pane (with tabs for multiple open files), and the lower right panel is where your terminal (or several terminal tabs) resides.
Note: I am calling them the editor pane, and the terminal pane, but they are just panes and you can open a terminal or file on either of them. I prefer the typical convention of top pane for files, and the lower for terminals / consoles, but you are free to mix as you wish.
There are a couple ways to populate the filesytem pane. Obviously, you can just create new files and directories on this blank slate as you wish. However, you probably already have projects you’d like to work on — perhaps in a Projects or a dev directory in your /home directory.
Well, you can easily just link an existing project directory into your workspace. So, if I have a /home/pi/dev directory (and I do, because I just made one with a dummy project in it), I can go to the terminal in the Cloud9-IDE pictured above and do:
$ ln -s /home/pi/dev dev
Now that directory is linked inside my workspace and shows up in the left filesytem pane. I can open it, and any subfolders and double click on any file to open it in the editor:
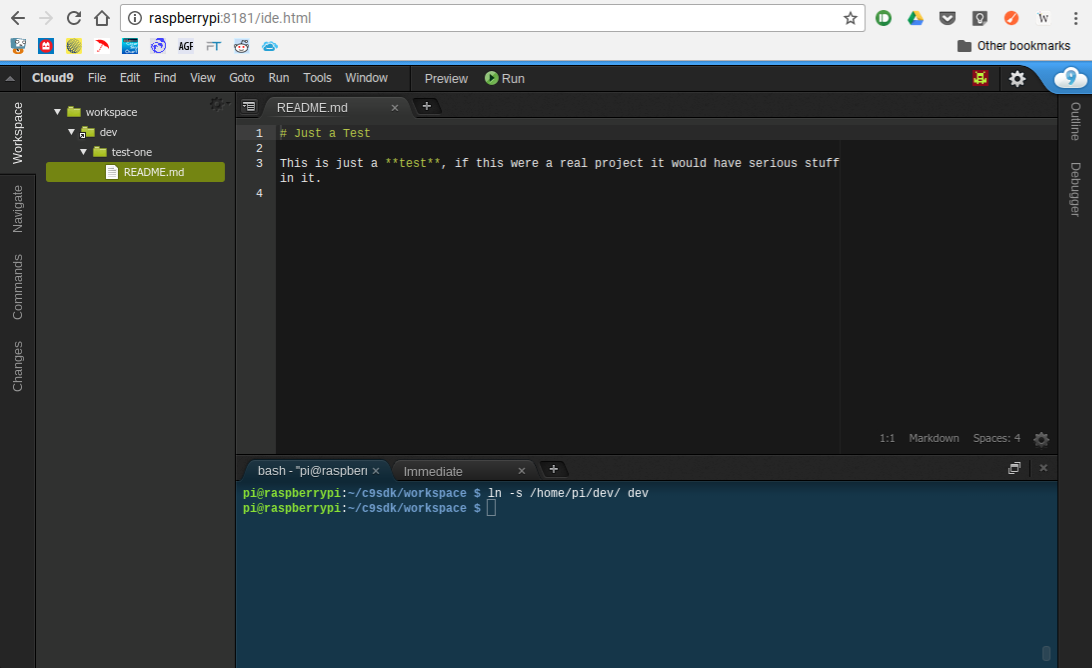
Opening a file in the IDE
As you might have noticed, I chose to close the “Welcome” tab first, but it doesn’t matter.
If you want access to your entire home directory, there is a provision for that built in. Just select Show Home in Favorites from the filesystem pane’s config menu:
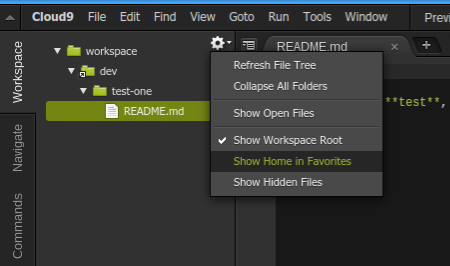
Adding /home from filesystem config menu
Now your /home directory is available to browse (and open files from) in the IDE.
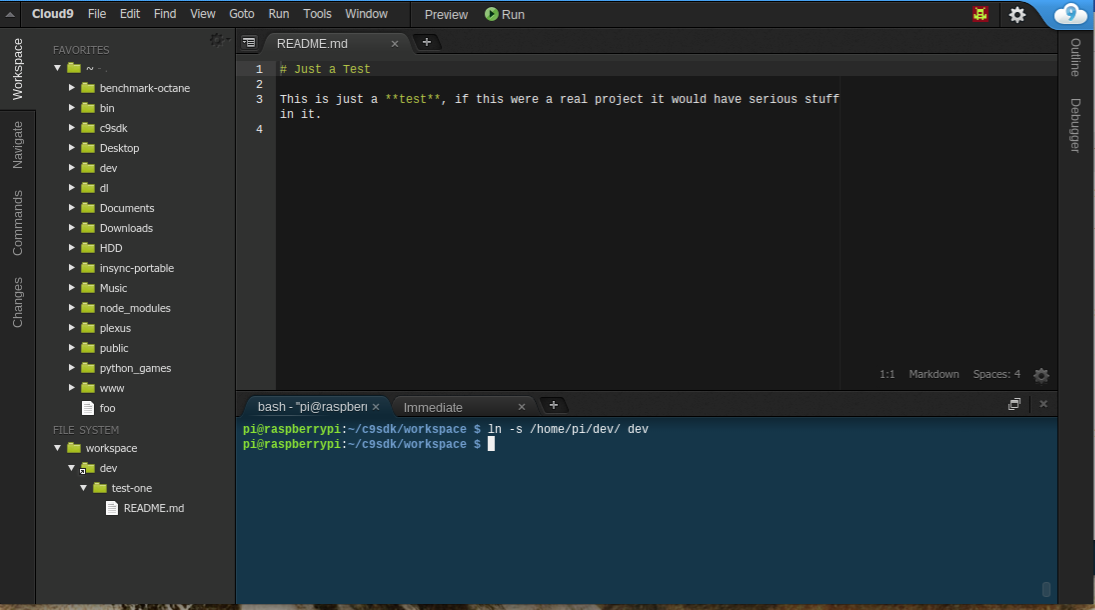
Home directory in Favorites
Lastly, if you are like me, even though I appreciate a tabbed gui editor, I don’t much care for digging through directories in a gui filesystem and double-clicking to open files. You can open files from the terminal using the c9 script included in the Cloud9 install. It will be located in the /bin directory of the primary install: ~/c9sdk/bin/c9 in our case.
The c9 script has a few associated commands, one of which is open which does what we want, so we can do the following in the terminal:
$ ~/c9sdk/bin/c9 open filename
$ ~/c9sdk/bin/c9 open posts/*.md
Of course, no one wants to type all that, so link it to your personal /bin directory, and even give it a new name (I named it ace, which is, in fact, the name of the built in Cloud9 editor):
$ ace open filename
$ ace open posts/*.md
and for files that exist already, you can leave out the open command and just call:
$ ace filename
To keep your Cloud9 server up and running you can put it under control of the forever program:
$ sudo apt-get install npm
$ sudo npm install forever -g

$ cd ~/c9sdk
$ forever start server.js -p 8181 -l 0.0.0.0 -a name:passwd -w workspace
This will start up the server and supervise it in the background. You can find out more about forever at this site.
Conclusion
Now your raspberry pi (or other SBC) can act as a devlopment server with a nice Web-IDE. Or, perhaps a writing server (this blog is created on a NanoPi Neo Air, connected to from a chromebook via Cloud9). With the low cost of acquiring and running SBCs like the raspberry pi, nanopi, and many others, there’s no reason not to have a few such development servers (yes, I am an enabler).
__END__